
Brief
To design and make a speaker box using laser cutting techniques and electronically wiring and soldering the components of the speakers.
Research
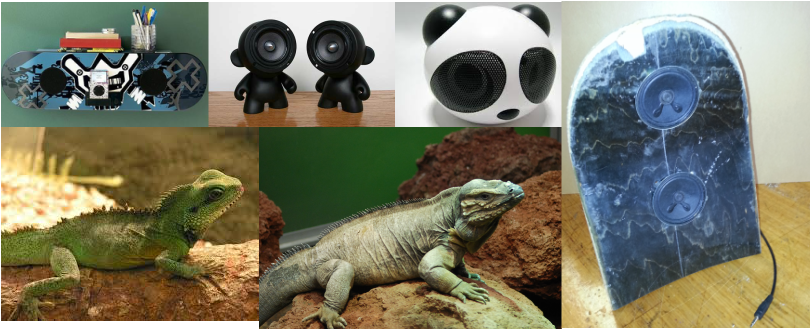
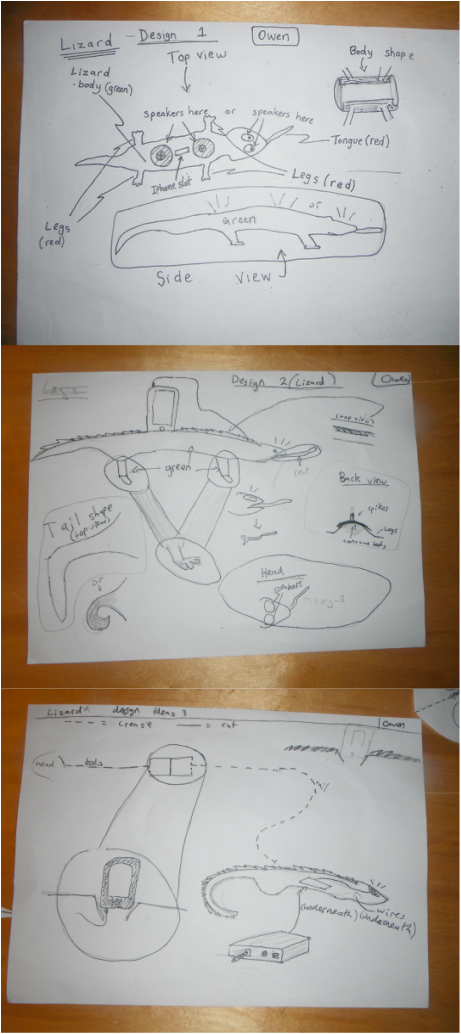
Summary: After researching speaker designs and speaker boxes, as well as creating a recycled one from a skateboard, it was decided upon to attempt an animal design, that has eyes as speakers. A gecko/lizard was selected because it has several distinct features in its legs, head, eyes, and spikes running down the back.
Designing:
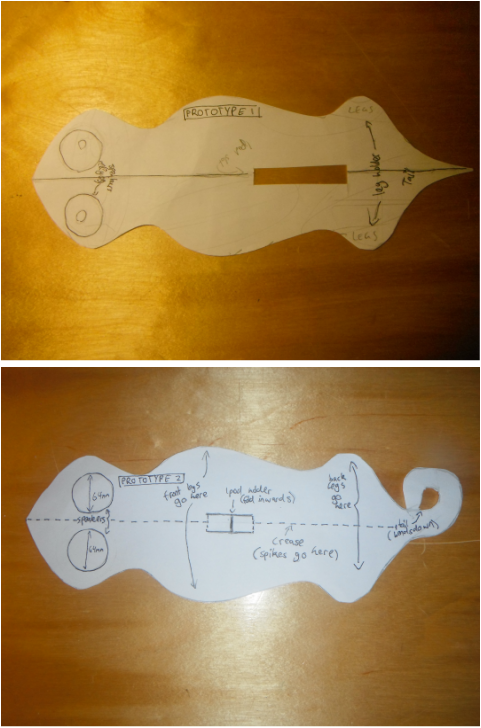
Prototyping:
Creation
|
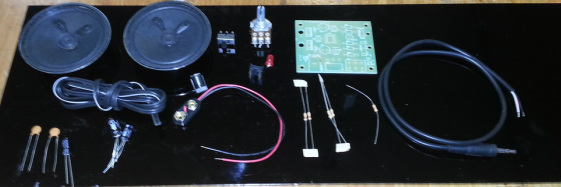
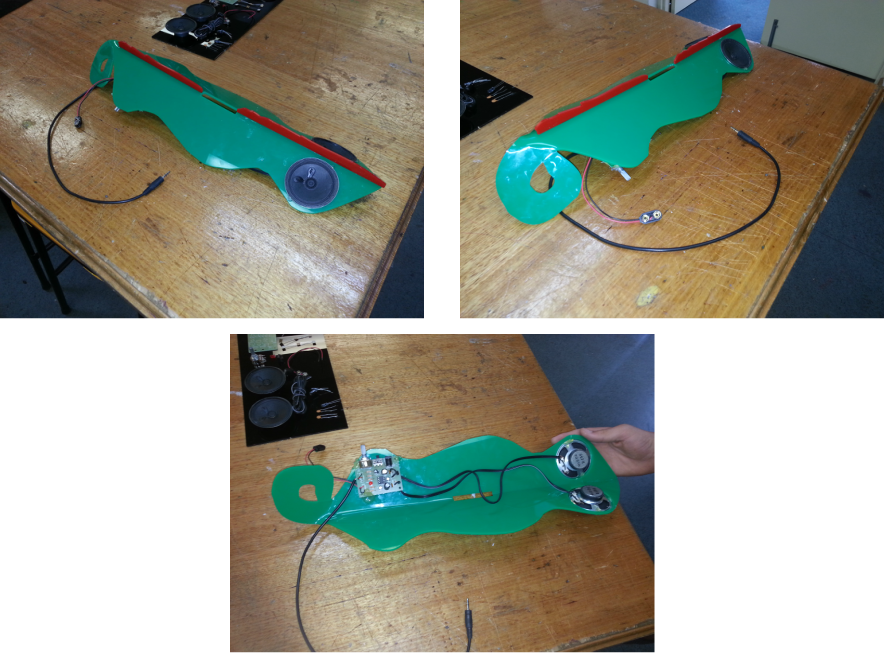
Step 1 - Soldering and wiring speaker components:
The first part of making the speaker box is to make the speaker system. Given instructions, soldering irons, solders and the equipment, the components were created. This included soldering LED's, distributors, speakers and more onto an circuit board using the soldering iron, ans using electronic wires to create a current between the board and the speakers. |
|
Step 2 - Making design in Corel Draw to print out:
To recreate the design virtually, pictures were taken, inputted into computer, then virtually traced to get a rough outline. Then, the design was re scaled so that the speaker holes were the right size, 63mm, and sent to the virtual printer. Also, extra pieces needed had to be drawn up, such as the legs, spikes, tongue, etc.
To recreate the design virtually, pictures were taken, inputted into computer, then virtually traced to get a rough outline. Then, the design was re scaled so that the speaker holes were the right size, 63mm, and sent to the virtual printer. Also, extra pieces needed had to be drawn up, such as the legs, spikes, tongue, etc.
Step 3 - Laser cutting:
The designs were then sent to the laser cutter, which uses a high power (and temperature) laser to cut, or engrave a design. The material used was acrylic and the chosen colour was green for the body, as that's what the above lizards are, and the spikes are red, just to stand out from the rest of the design
The designs were then sent to the laser cutter, which uses a high power (and temperature) laser to cut, or engrave a design. The material used was acrylic and the chosen colour was green for the body, as that's what the above lizards are, and the spikes are red, just to stand out from the rest of the design
Step 4 - Assembling design
Firstly, the gecko had to be bent down the middle, and the tail needed to be bent down, which was achieved by using the strip heater. Next, the stripes hat to be glued on, by just simply using acrylic glue and placing the two pieces in their corresponding creases. Although not achieved, the next step was to attach the legs and tongue using glue. The last step was to attach the electrical components and speakers. To do this, the speakers were glued over the speaker holes and the circuit board was attached underneath the body.
Firstly, the gecko had to be bent down the middle, and the tail needed to be bent down, which was achieved by using the strip heater. Next, the stripes hat to be glued on, by just simply using acrylic glue and placing the two pieces in their corresponding creases. Although not achieved, the next step was to attach the legs and tongue using glue. The last step was to attach the electrical components and speakers. To do this, the speakers were glued over the speaker holes and the circuit board was attached underneath the body.
Final Product
Evaluation
In reflection, my designed was great in some areas, but failed in other aspects. There are some parts of the design I would change and some things I did well and wouldn't change:
Firstly, the things I did well were:
Things that could be improved include:
Firstly, the things I did well were:
- The body, tail and spikes of the design worked well and were completely finished - This is because I focused mainly on these aspects and not others. The body of the lizard was the right size and the speaker holes held the speakers very well.
- The wiring and soldering of the components was almost perfect. The only way I could improve that was to be more careful with the speaker wires, as only 2 or 3 strands were attached, when there should be at least 4. This is due to poor cutting. Also, the circuit board is glued on in optimal position, where only the volume switch can be seen for an observers perspective.
Things that could be improved include:
- The lizard is not fully complete, as neither the legs nor tongue is attached - This is due to several factors. Firstly, the laser cutter stopped working halting any further designs from being cut. This isn't an excuse though, as there was plenty of time to do it before hand, and poor organisation lead to it being incomplete. Another factor that lead to the final products completion is all the set backs in the creation, including breaking part of the nose and having to glue it.
- The phone holder snapped off and there was no replacement - This is because of a mistake in bending it a little to far, causing it to snap along both creases. The above listed reasons for in-completion are the same reasons for there not being another way of attaching an iPod holder.
- The overall finish could be smoother - The final design had some spilt acrylic glue on it and many fingermarks. Due to time constraints, it was not polished and that is why it doesn't have a completely smooth finish.
